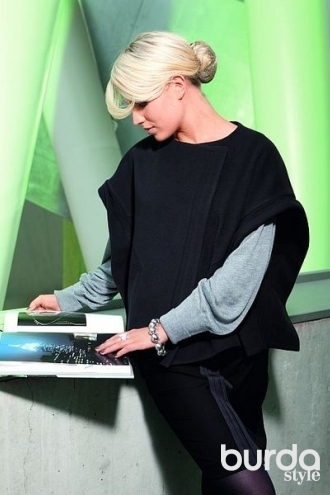
It seemed a waste to do all those pattern alterations for just one top, so I made another Vogue 1247.
This time I chose a mystery silk that I picked up from the Fabric Store. It had a very bouncy texture and was originally a bone white colour. White doesn't look great on me, so all along I intended to dye it. I was planning a pale peach top.
Up until now, I have only used my silk dyes for small amounts of lingerie elastic and fabrics. For this length of fabric, I decided I would get more even results by using the washing machine. I can't pause the cycle on my machine, which means I can't control the amount of time the fabric sits in the dye. By the time I read the amounts of dye required per weight of fabric, I had already pre-soaked my fabric and was unable to weigh it. I guessed at how much dye to use, then added a bit extra for good measure, and obviously added way too much. Lucky I like this orange colour.
I didn't even attempt French seams on all these pattern pieces in this bouncy fabric. I did go to the trouble of buying matching thread for the overlocker, so it still looks pretty neat on the inside.
I haven't actually worn this top out yet. It doesn't feel as chic as my previous version, and I am yet to work out when to wear it, but as our hot summer ends, I'm sure it will find its place.
Showing posts with label silk. Show all posts
19.3.18
11.4.16
A little top with lace shoulder yokes
I must have thought I was living somebody else's life when I ordered this fabric. I have very little black in my wardrobe, and the print is a little conservative for my lifestyle. Never-the-less, it is a lovely little top, and a style that I have been wanting to draft for a while now.
The design is basically a shell top, with contrast shoulder yokes. The bust darts have been rotated to CF neckline pleats. The front waist darts have been ignored. The back waist darts are sewn in. The back shoulder darts are incorporated into the yoke shaping.
I went for 3 inches of ease this time around, and that feels comfortable.
The main fabric is a silk from EmmaOneSock. The shoulders are a black lace (hard to tell from the photos), leftover from a long ago garment.
The design is basically a shell top, with contrast shoulder yokes. The bust darts have been rotated to CF neckline pleats. The front waist darts have been ignored. The back waist darts are sewn in. The back shoulder darts are incorporated into the yoke shaping.
I went for 3 inches of ease this time around, and that feels comfortable.
The main fabric is a silk from EmmaOneSock. The shoulders are a black lace (hard to tell from the photos), leftover from a long ago garment.
7.9.15
The Diamond Dart
When I first saw this draft in my craftsy course, I thought it was a bit kitsch. It has grown on me over time (and I have had time, because it is taking me quite some time to get through this course!) and now I have found a way to make it work for me....as a tank top with a peplum skirt and V back.

The bust and waist darts are rotated to form the sides of the diamond, so there are no darts on the front of the top.
In the back, I cut a V neckline and angled the back darts to mimic this V.
Here's a closer shot of the back darts. You can also see some of my neck binding. I bound the armholes and neck with self made bias strips. I have been watching old episodes of the Great British Sewing Bee, so I am a bit more conscious of how long my sewing takes and how neat (or not so neat it is). It takes me an hour to bind the armholes and neck of a tank top.
I am so proud of my neat sewing on this top. Look at the perfect top of the diamond.
The bottom of the diamond is pretty good too (though I do need to remove that gathering stitch from the skirt portion)
I am not super happy with the draft of the skirt portion. It is both flared and gathered. I didn't muslin it, because I thought that my fabric would behave very differently to the calico I used for the muslin, and I don't have unwanted silks just lying around to use for muslins. I think I perhaps overdid it. Maybe gathered without the flare would have been enough. To make matters worse, I thought I had heaps of fabric so I cut the bias binding strips before the I drafted the skirt...and then I could only fit the skirt pieces if I cut them on the bias. As you can imagine, this was an absolute nightmare to hem...bias circular very full pieces. In the end, I just stood in front of the mirror with a pair of scissors and hacked away. I really should invest in a hem marker of some sort.
Some photos on me. Front view...
I forgot to get a back shot this morning, so here is a less than flattering shot of my behind when I wore it with a turquoise skirt last week. Actually, the back V looks wider here than I thought it would...I really should take back photos in the muslin stage. The top is meant to be a loosish fit so I can pull it on...which I can, but it does involve a little wiggle. I will have to add width next time.
I like the upper portion of this top, so I think I will make it again with a different skirt portion. I think it will be a great pattern for mixing prints.
The bust and waist darts are rotated to form the sides of the diamond, so there are no darts on the front of the top.
In the back, I cut a V neckline and angled the back darts to mimic this V.
Here's a closer shot of the back darts. You can also see some of my neck binding. I bound the armholes and neck with self made bias strips. I have been watching old episodes of the Great British Sewing Bee, so I am a bit more conscious of how long my sewing takes and how neat (or not so neat it is). It takes me an hour to bind the armholes and neck of a tank top.
I am so proud of my neat sewing on this top. Look at the perfect top of the diamond.
The bottom of the diamond is pretty good too (though I do need to remove that gathering stitch from the skirt portion)
I am not super happy with the draft of the skirt portion. It is both flared and gathered. I didn't muslin it, because I thought that my fabric would behave very differently to the calico I used for the muslin, and I don't have unwanted silks just lying around to use for muslins. I think I perhaps overdid it. Maybe gathered without the flare would have been enough. To make matters worse, I thought I had heaps of fabric so I cut the bias binding strips before the I drafted the skirt...and then I could only fit the skirt pieces if I cut them on the bias. As you can imagine, this was an absolute nightmare to hem...bias circular very full pieces. In the end, I just stood in front of the mirror with a pair of scissors and hacked away. I really should invest in a hem marker of some sort.
Some photos on me. Front view...
I forgot to get a back shot this morning, so here is a less than flattering shot of my behind when I wore it with a turquoise skirt last week. Actually, the back V looks wider here than I thought it would...I really should take back photos in the muslin stage. The top is meant to be a loosish fit so I can pull it on...which I can, but it does involve a little wiggle. I will have to add width next time.
I like the upper portion of this top, so I think I will make it again with a different skirt portion. I think it will be a great pattern for mixing prints.
Labels:
craftsy,
EmmaOneSock,
self-drafted,
silk,
Suzy Furrer,
top
15.6.15
Not actually a kimono
I have been loving all the kimono fashions around lately. I have been on the look out for suitable fabric for a few months, and as you know, good things come to those who wait!
So then I set off to find a kimono pattern. There are plenty of instructions to make your own pattern on the internet, but I thought that I would flip through my pattern magazines to see if there was anything suitable there first. It turns out that I do have a few variations on kimonos (well, it is a rather large pattern collection), but in the end I was more taken by the line drawing for Burdastyle 9/2010 #117 & #118.

Never mind that the originals were in heavy wool.


So it is not a kimono. It does not have kimono sleeves. Actually, these ones are better because they do not fall in my cooking or my washing or whatever else I am doing. Mostly, I liked the inset panels. I made mine up in a floaty silk, somewhere between the two in length and sleeve length and without the collar or pockets.
The back, so that you can see the inset panels at the back.
Today I wore it with jeans (duh), but I also like kimonos styled over shorts or summery dresses.
I must admit though, the first few times I wore this out of the house I had to shake off the feeling that I was stepping out in a bathrobe :).
So then I set off to find a kimono pattern. There are plenty of instructions to make your own pattern on the internet, but I thought that I would flip through my pattern magazines to see if there was anything suitable there first. It turns out that I do have a few variations on kimonos (well, it is a rather large pattern collection), but in the end I was more taken by the line drawing for Burdastyle 9/2010 #117 & #118.
Never mind that the originals were in heavy wool.

So it is not a kimono. It does not have kimono sleeves. Actually, these ones are better because they do not fall in my cooking or my washing or whatever else I am doing. Mostly, I liked the inset panels. I made mine up in a floaty silk, somewhere between the two in length and sleeve length and without the collar or pockets.
The back, so that you can see the inset panels at the back.
This is what it looks like pinned closed (excuse the death stare!). I'm not planning on wearing it this way, but I could, and it shows off the angled hem.
Today I wore it with jeans (duh), but I also like kimonos styled over shorts or summery dresses.
I must admit though, the first few times I wore this out of the house I had to shake off the feeling that I was stepping out in a bathrobe :).
2.12.14
Stylearc Amber Woven Blouse
Stylearc is a pattern company that I have been wanting to love, but haven't quite. This top is the Amber Woven Blouse, and I think it has been my most successful stylearc project so far.
I think that the success is largely due to the fabric choice. It is a stretch silk georgette, which is not a fabric that I have used before. It drapes well and I suspect is rather forgiving when it comes to fit. I bought it to make a dress for my daughter and then used something else for her instead. I thought that the fabric would then languish in the stash as it wasn't really "me". Now that I have made this top up, I totally love it.
I changed the pattern a bit to use a wide lace insert. The external facing piece on the original pattern is round. I got the lace from Lincraft, tea-dyed it (though maybe not enough, or maybe it didn't take the tea too well), then found it torn, so had to do some repair embroidery with solvy underneath. This is a technique for machine embroidery that I have read about and never had need to use until now. I also changed to a bias binding on the neck to keep the lace in check.
I only had to make minimal fit changes (I did make a muslin, and then when I went to adjust the pattern, I could not find the muslin and had to guess the changes). I shaped the side seams a little, widened the hip area and raised the front darts.
I will make this pattern again, probably using the colour blocking suggested on the pattern.
29.6.13
Fallen Tree
I made this top back in January. I've been meaning to post pictures of it ever since, but thought it would make a nice picture with a very architectural tree in the dunes near here. Only now that I have finally got the top together with the tree, the tree has fallen over. Didn't quite capture the moment, did I?
I made this top whilst on holiday in Noosa, I just traced around a favourite Burda top I had with me at the time. The Burda had a curved yoke, and that was a little tricky to copy on holiday, so I just made the front longer, pinned it on me, and took up a front dart instead.
It is such a favourite, that I almost stop myself from wearing it, so that it doesn't wear out too quickly. Do you ever do that? It goes with almost everything in my wardrobe. ...black pants, red shorts, yellow skirt, white skirt, sandy linen shorts. Dress it up, dress it down. Tuck it in, leave it out.
A day or two after I bought the fabric, one of my sisters sent me a birthday present...a set of bangles that perfectly matched the colours in the top. How did she know?
I bought this silk fabric at Oh, Sew Noosa. Was not very happy with the service. I only bought my length, as I did not want leftovers (I was on holiday after all). Even though it is striped, it was not cut on grain, at either end. By the time I trimmed the ends straight, I had about 8 cm less than I ordered. I think that if you are going to be skimpy with the cut, you had better make sure you are on-grain. So the top did end up a little shorter than I wanted.
Still, I do love it and will wear it until it wears out!
16.2.12
The ghosts of past pattern purchases
I can't seem to get quite so excited about new sewing patterns these days. I get caught up thinking something like, "Oh, cute blouse pattern. Would I use this? Well, I already have 3 blouse patterns that I haven't used, so I guess not." I am being weighed down by past pattern purchases. A fabric stash is a joy, but an underutilised pattern stash is just wasted money.
Take, for example, the HotPatterns Artful Dodger Prudence Blouse. It is dated 2005, and I think I bought it pretty close to its release date. It was expensive, but there was a 3-for-2 offer, so I justified the shipping cost and clicked on the "pay now" button. Then only 2 of the patterns arrived, so more expensive than I calculated. My emails about the missing pattern went unanswered. The Prudence Blouse got bad reviews. This all put me off, but I could not get the promises of the sophisticated fashion illustration out of my mind. It has stayed there, niggling at me, for 7 years now (a testament to the fashion illustrator and the marketing of HotPatterns).
7 years is a long time. So I have decided to either throw out the patterns that are holding me up, sew them or sew them up and then throw them out. Starting with the Prudence Blouse.
I made a few alterations, including shortening the hem, reducing some of the width and playing around with the pleats as they were not drafted correctly.
The fabric is a silk that my mother bought for me in Turkey. When I washed it, it took on a summery seer-sucker quality.
I'm so pleased that I have finally made it. Do I like it? Some days. Other days it reminds me of a bed jacket. The design lines are not quite as they appear in the exaggerated drawing, but the overall shape is cute enough. I like the pleating details. I need to play around with accessories and what to wear it with (but I haven't unpacked all that stuff yet!). The sleeves are more binding than is comfortable. So I will throw the pattern out and move on, but I am pleased that I made it up...don't want to die wondering and all that!
I have been organising my patterns. I found these boxes at OfficeWorks that seem to be the perfect size for patterns. (They are also available at Howard's storage world, but they cost more there).
I have also used them to store my magazine patterns. I put each magazine, with its patterns and any that I traced off in a plastic sleeve. I have also stored some of my pattern books in the boxes with the magazines, to keep them all together. Not that I have anywhere to store the boxes yet, but they should fit neatly in deep drawers or on shelves.
I originally bought them for my Jalie patterns, but the Jalies don't actually fit. So the Jalies are in a magazine holder for now, but I'm not sure that this is the perfect solution yet. I also have not sorted the Vogue designer patterns yet. I have found a box that fits them, but it is not the same style box as these, and I am trying to be ordered and neat...I will keep looking for a while.
In sorting the patterns, I have learnt a little about the patterns not made up. They tend to be
- the patterns I bought to minimise shipping-per-pattern costs. False economy there.
- patterns that require a lot of yardage. Should read backs of pattern envelopes before I buy. I am very unlikely to hold more than 2 m of a fabric in stash and some of these patterns ask for 5 and 6 m!
- patterns that need to be traced off. Should acknowledge my own laziness and only buy magazines if I am particularly excited by the designs.
- patterns that don't suit my lifestyle. I have no need for a business suit. Ever.
Now I just need to pull out the ones that I was excited about, but never got around to, and get on with it.
24.10.11
here's one I prepared earlier...
How often do we sewers lament that we didn't finish off something properly, because we were still sewing up hems the moment before wearing the garment out of the house? Well, I had the opposite problem here. This dress languished in my sewing room, just waiting for ties and the binding to be completed because I had nowhere to wear it. We had an unseasonably long winter up here, so even once it was finished, it sat in the wardrobe for a long time. Finally, last week, it got its first outing.
The pattern is a frankenpattern of Vogue 8631 and Vogue 8684. I made a muslin of Vogue 8631 last year and asked for feedback...some of you suggested that it made me look too wide...sadly, it is not the dress making me look wide, that would be my wide bottom making me look wide. However, I do accept that the dress was not disguising my wideness, and much as I love an oversized top, they do hide the petite bits of me that trick people into thinking that I am not a wide person. So I ditched the kimono sleeves and bodged the raglan sleeve and sideseam shaping from Vogue 8684, whilst retaining the wrap and pleating from 8631. In truth, this has saved me from fretting over the unused pattern 8684, which I love, but has a drop waist, which is equally unflattering on me.
The black and white fabric was a silk from my stash. I had bought it thinking I needed to up the neutrals in my wardrobe. My sister was rifling through my stash and declared that she didn't like it, because it reminded her of corporate uniforms. That sounded like a challenge to me, so I immediately took it from the stash and got to work. The sleeve fabric is left-overs from this dress. I quite like the clashing combination of fabrics, although my children are not so convinced. My elder son, who has a bit of an eye for fashion, thinks it would have worked if the brown bits of the sleeve print were black.
So, bodgy patterns, bodgy fabric choice, all brought together to make a dress that I absolutely love. I think it looks better in real life than the photos, and it feels gorgeous to wear, all silky and drapy. Perfect for spring.
30.5.11
Underwater Dreaming Dress
Can you tell that I've been playing around with the self timer? Trouble is, I'm not sure how to get the photo to focus on me, and not the background, which means that the details of this dress are a little obscured, sorry.
Fabric: "Underwater Dreaming", printed silk satin from Tessuti
Pattern: Vogue 8529, previously made in a silk jersey
This fabric was a gift from Colette. The colours are divine and the shine is really opulent. In spite of all this fabric gorgeousness, it has taken me a year to make it up. It was that whole stripe dilemma thingy. I would sit down at the table, pattern and scissors in hand and go...stripes across? stripes up and down? to the mirror. pin. pin. pin. oh, I don't know. an hour later, put everything away again.
Genius that I am, it only took a year to figure out that I could mix them up a bit. No project runway deadlines in this house!
The wide hem band and the princess seams give the back of the dress a bit of a mod look. The front cowl does not drape as nicely as my jersey version. It is possible (can't quite remember) that I changed the grain of the pieces to get the stripes how I wanted them, so this may be my fault, rather than the pattern drafting. I love the colours. When I slipped it on during a late night sewing session, I suddenly looked a whole lot less tired, so one of these colours must be "my" colour. Just need to figure out which one.
The fabric did fray. It would have been nice to use French seams, but I wanted to fit as I went, rather than make a muslin, so I just finished my seams with an overlocker.
21.10.10
Tracy Reese Vogue
I am writing today's post using a borrowed monitor because my monitor has broken. This borrowed monitor has funny dimensions, distorting everything to be short and dumpy, but I am posting anyway, because I can't see myself getting a new monitor in the near future. I have just guessed at which photos might be most flattering and not cropped them at all. I probably won't leave too many comments on other blogs until I get a new monitor, because I'm sure you don't won't me to say, "Gee, that outfit that you have slaved over really makes you look short and dumpy! On the other hand, it is probably a great time for me to order patterns, because I can see what they would look like on shorter, wider people than Vogue models. Anyway, enough guff, on with the pattern review.
Pattern
Tracy Reese Vogue 1190.
Fabric
A silk twill from EmmaOneSock. I got it at a bargain price because it was cut at the wrong length for another order. Happy days.
Fitting
Dresses are my nemesis, and this one was no exception. I did make a muslin. There was lots to alter.
Surprisingly, I had to redraft the back straps, to get the back and shoulder to sit right. I usually do make significant shoulder alterations, so it is probably a fit issue more than a drafting issue.
In waisted dresses, I am never quite sure where to put the waist. I have a high waist, so putting the waist at my natural waist can emphasize this flaw in proportions. For this dress, putting a contrast waist below my natural waist made me look wider than I am. I made the muslin using my natural waist, but decided to cut the dress with a longer bodice. I really should have muslined a longer bodice.
I have uneven hips (well, who doesn't after lugging 3 children about), but I have never bothered to correct for this before. I made the dress and then when I looked in the mirror, all the arrows on the fabric seemed to be pointing at the wider hip, so I let the front and side seams out on one side.
Erica B has made this dress. She seemed to have a far easier time of it than me (sigh). Anyway, if you look at her entry you can see a photo of this dress being sold at Nordstroms. It looks the same as the Vogue pattern cover, except that the proportions are different. I only notice, because of my many hours trying to decide where to put the waist. In the Nordstrom version, the skirt : bodice length shows a much longer skirt than even Erica's version, and Erica has added 3" length to hers. I presume that the Nordstrom version is RTW and not customised to the model. So then I wondered if they have doctored the photo to make the model taller and thinner, more like fashion illustrations. Do you think they really would have done this? I hope not, because it is hard enough buying online without altered photos. I guess the other possibility is that the Vogue dress is not the same dress as the one photographed.
Cutting
I made a lot of cutting mistakes, which is unusual for me, as I enjoy the cutting stage of a project. A bit of clear thinking during the cut saves a whole lot of angst later on. This time around, I had to go through the angst.
Vogue bodices are usually about 3.5 cm too long for me. I decided to cut the bodice at the Vogue length. I had meant to lengthen the skirt 3.5 cm in case I changed my mind and used a shorter bodice. I forgot to lengthen the skirt and then I ended up using a shorter bodice, leaving the skirt short.
I usually cut an 8 across the chest and a 12 for the rest of the bodice. I cut the top ruffle in an 8 and later realised that I needed the 12 for length, just the 8 for width. This meant that the top ruffle was not long enough to cover the next ruffle down so had to be removed and re-sewn.
In the muslin, I pinched out a tuck in the neckline. When I tried the bodice on during sewing, it didn't seem to fit right, so I assumed that I had forgotten to make the tuck during cutting. So then I overlapped the bottom of the front bodice, and when I shortened the bodice by 2 cm I cut the extra off. Only, after I attached the waistband, the front skirt was hiking up. So I think perhaps I did make the tuck, only now I had essentially made 2 tucks. I did my best to mitigate this by reducing the seam allowance in the front when attaching the waist band.
Sewing
This pattern requires quite a bit of care during sewing. The ruffles all have narrow hem edges, which are then folded in so that you can't see the hemmed edges. This seemed a lot of bother, and afterwards I thought it would probably have been easier to fold the ruffles right sides together and sewn down the sides, before turning out a pocket. I don't think that this would have detracted from the design.
I didn't sew the bust dart on the outside. There were no other exposed details on this dress, so I thought it would look like a mistake, if you could actually see it in this fabric anyway.
The waistband is a separate piece, sewn into the dress, with a waistband facing on the inside. This means at the zip there are 5 layers of fabric (2 waistbands, I dress, 2 seam allowances) plus 2 interfacing layers to sew through. I would recommend a good quality zip and to zip slowly, so that you don't break the zip once it is in. For the waistband I used a polyester crepe, which was a bit spongy, so perhaps you would not have this problem in a lighter fabric.
The shoulder seams are sewn in a french seam. With the ruffle and the bias binding on one side and the back strap and a facing on the other front edge, I found it difficult to sew this neatly.
The skirt seams are all sewn as french seams. I would recommend practising your french seams before sewing this dress, to ensure the seam allowances are accurate. A small error in the width of a french seam, multiplied by the 7 skirt seams, can easily lead to a few cm of error in width.
Take care gathering and positioning the back strap. The outside edge of the back strap is on a diagonal, so the length of the strap will be wrong if the gathers slip out and the edge of the back strap is in the wrong place.
I wore this dress out the other night. I did receive lots of compliments, even from strangers. The photo above was the best we got on the night. The benefit of this was that my photoshoot today took me to the far reaches of my back garden, where I have not been for a while, and I discovered that these gorgeous gingers have flowered after the recent rains.
Subscribe to:
Posts (Atom)